GK Install Part 7 – New pickguard, Japanese measurement woes

After waiting four weeks for an eBay seller to completely fail to deliver a pickguard, I gave up and bought from another seller. Japanese Fenders have a number of annoying non-standard features and the pickguard is no exception. The pickup cavities are in a different place necessitating more wood removal, the screw holes don’t match up and the bridge cutout needed to be opened up with a file.

IMG-20150418-00262

I’ve abandoned the coiltap switch again, just a combined S1/S2 switch and a GK/magnetic selector. And damn, those F-stamped knobs are classy. The horribly cheap plastic enclosed switched has been binned in favour of a proper Switchcraft unit. I appreciate those switches must save Fender Japan a good 50p per guitar but really, they have no place on a quality instrument.

IMG-20150418-00261

We’re getting there! Side note, I’d have got a lot more done today if I hadn’t misplaced my desolder pump. I put the thing down for five minutes and it just disappeared off the face of the planet. I’ve searched every room in the house and it’s nowhere to be seen.

IMG-20150418-00260

Eagle-eyed viewers will notice that I went too deep with countersinking the pickup screw holes. Another Fender Japan annoyance is their use of metric threaded pickup screws so I had to countersink the plastic or replace the pickups. I went for the cheaper option and got a bit over-enthusiastic with the countersink bit.

IMG-20150419-00263

GK Install Part 6 – Floyd Rose Locknut

After leaving the project alone for a few weeks while my eyesight recovered enough to continue, I’m back to drilling and filing. Today’s job has improved the guitar no end, I’ve fitted a Floyd Rose locking nut and dumped the over-engineered and unstable Fender unit in the bin. Pickguard should arrive this week, then it’s time to re-enable the magnetic pickups and we’re finished until a standard fitting Kahler bridge arrives. not sure when that might be, those things do not come cheap.

IMG-20150323-00256

GK Install Part 5 – Cramming it all it there!

IMG-20150224-00215

Quick update and a crappy low light cameraphone post. Plans have been scaled back a LOT. The Kahler bridge is a non-starter, it’s not a standard Strat fit into the pickguard cutout so for now the old bridge is back on there. all the GK wiring is completed with the up/down and GK/magnetic switches working just right. The magnetic pickups are disconnected for now but a quick test on Boss Tone Studio tells me the pots and switches all do what they should and the hex pickup notices when something’s vibrating near it.

Unfortunately I’ve suffered another setback here by going nearly blind in one eye which has rather compromised my soldering abilites. Surgery tomorrow, if I can still see then I’ll do more work this weekend and maybe get some strings back on the Strat. It’ll be GK only for a while but I’m a bit tired of seeing it in bits now!

GK Install Part 4 – Cutting holes and starting to wire up

I’m not really a fan of routers for this kind of work. The highly curved edge of a Stratocaster just isn’t suitable for routing unless you spend hourse building a jig, this job’s much easier with a good sharp chisel.

IMG-20150209-00210 IMG-20150211-00213

Roland don’t supply wood screws for the plate! Just used a few pickguard screws for now, to be replaced shortly. The routing inside made it ridiculously easy to pass the thick GK cabling into the control cavity.

I’ve abandoned the idea of a custom pickguard, too expensive and the guitar is so non-standard it’d be way too much trouble so I’m just going to cut this one to suit the GK stuff. The S1/S2 switching is going to be on a momentary action ON/OFF/ON switch, by far the best way to do this job. The GK/MAG switch can go in the place of the old coil tap switch, coil taps never sound good and this one’s no exception. Interestingly the Fender pickup is a 3-conductor humbucker, looks like the middle tap shorted to ground splits the coils. I’ll just be leaving that as a humbucker though, I’ve got plenty of single coil Strats for that sound.

IMG-20150211-00211 IMG-20150211-00212

Just a bit more chiselling needed to allow the GK pickup wires to pass into the cavity then we’re in business.

GK Install Part 3 – Fitting the Kahler bridge

This was almost a doddle. Turns out the bridge wasn’t an exact match with the Stratocaster pickguard but a few minutes with a straightedge file solved that.

IMG-20150128-00209 IMG-20150128-00208

That’s rock solid now. The Kahler’s quite an impressive piece of kit, very easy to adjust and highly configurable to set string height, spacing and intonation. Next step, fitting the GK pickup, restring, set the neck relief, action, intonation and GK height.

GK Install Part 2 – dismantling and assessment

A chance find on Gumtree small ads has landed me a good deal on a Kahler non-tremolo bridge so I can now start dismantling the Strat and looking into the mystery of the Japanese routing and the bizarre System II tremolo system which appears to be entirely undocumented anywhere on the internet.

Step 1, neck off, whip off the pickguard and recoil in horror from the cheapo switch and pots. I expect to see those on a Squier, not anything with the hallowed name Fender on the headstock. Add those to the replacement list.

IMG-20150124-00192

Pickups are decent though. I had an E-series Squier from about the same year and I recall that had badly-made pickups with a bar magnet underneath like a P-90. These have proper magnetised pole pieces which would explain the dramatically better tone compared to the horribly harsh-sounding Squier.

IMG-20150124-00194

That trem system though … what a strange affair. The bridge has two large springs which pull against a block on a threaded rod. Spring tension is applied by turning a hex bolt near the strap button which moves the block further from the bridge. Here it is in various stages of dismemberment.

IMG-20150124-00191 IMG-20150124-00195 IMG-20150124-00196 IMG-20150124-00197 IMG-20150124-00198 IMG-20150124-00199

The bridge pivots against a horizontal bar held down with two hex bolts and threaded inserts. Fortunately these inserts don’t look like they will foul the Kahler mounting screws. Looks like we’re in business here. The Kahler routing template seems to indicate that the new bridge should perfectly cover the small amount of excess routing to the rear and side of the old bridge. And damn, it looks so much better with a white pickguard. Another advantage of all that routing is that I’ll have plenty of space to run the GK wiring.

IMG-20150124-00202 IMG-20150124-00203

That just leaves the output jack, soon to be repurposed as the 13-pin GK connector. The really good news here is that the hole from the jack cavity to the main body cavity is about quarter of an inch wide by an inch high so I won’t need to widen that at all to fit the Roland multi-way connectors through. Bad news is the jack socket barrel is held in so tightly with a nut and washer that I had to spend 20 minutes with a spanner and pliers getting it out.

IMG-20150124-00200 IMG-20150124-00201IMG-20150124-00207

All of which leads me to think that this is going to be just about the easiest GK Kit install ever. For the moment the guitar will be GK-only with no quarter inch output jack. If I feel the need later I may get the router out and install a Strat plate and jack. To be confirmed at a later date, for now it looks like everything should go fairly smoothly.

GK Install Part 1 – planning stages

And so it begins.

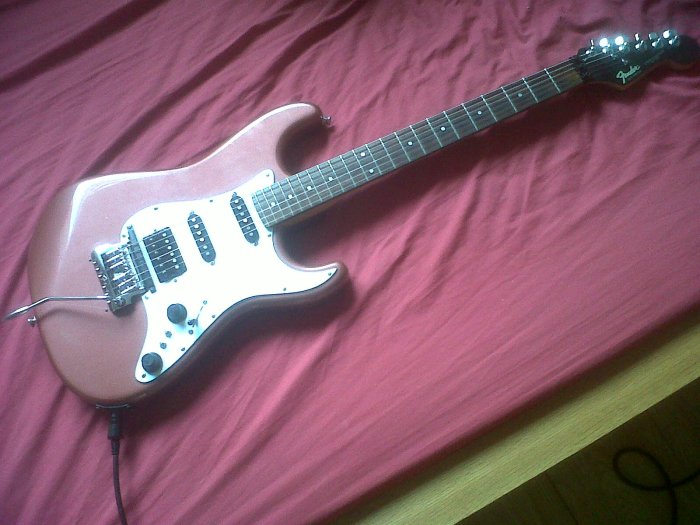
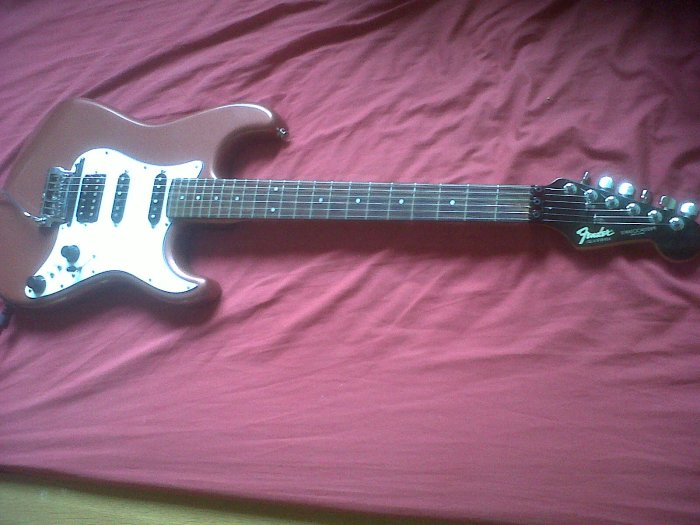
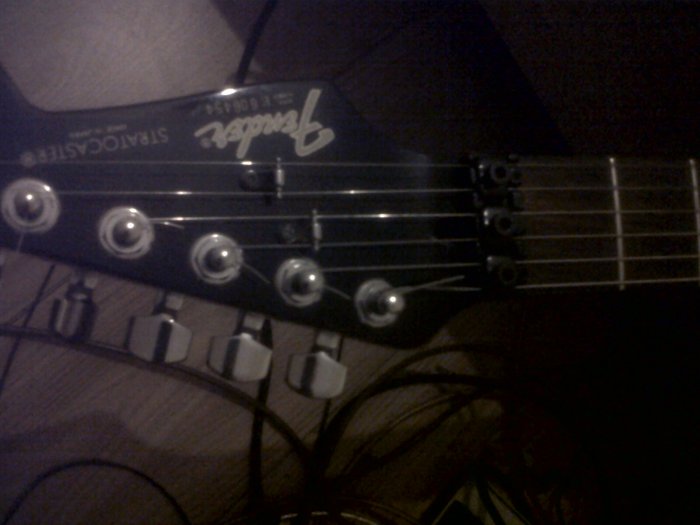
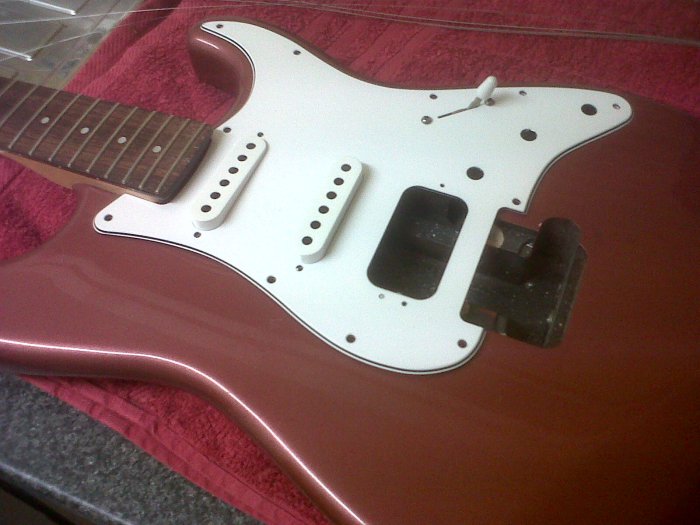
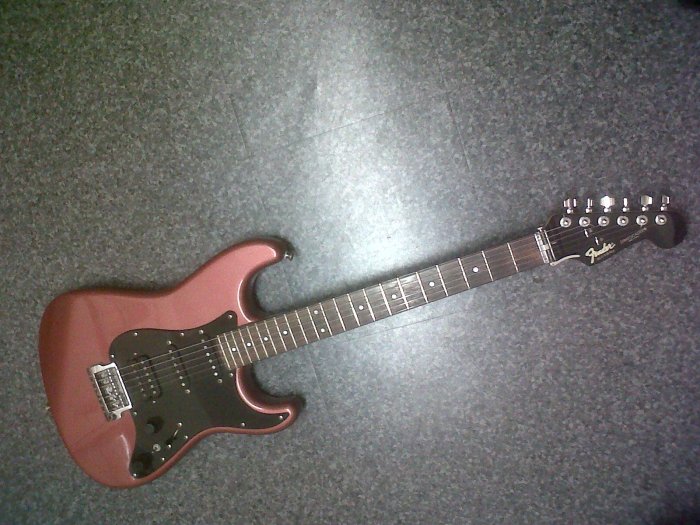
The Roland GK-KIT-GT3 arrived in today’s post, a rather unprepossessing white box stuffed with cheap flimsy electronic parts and an instruction sheet written in badly-translated Japlish. No, my guitar is not powered by a “buttery”. Before we rip the box open and drop a million screws everywhere, it’s time to examine the guitar this is going in and make some sort of appraisal of how work is going to progress. Here it is, my rather lovely if somewhat idiosyncratic 1986-ish Fender Japan Contemporary Stratocaster.

IMG-20150121-00183

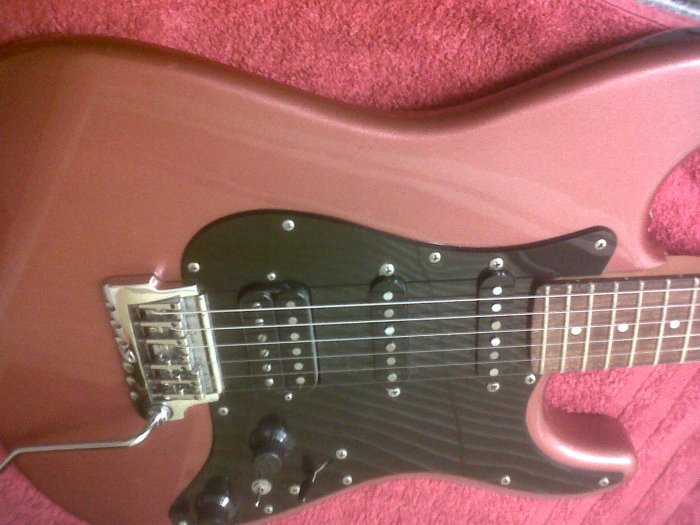
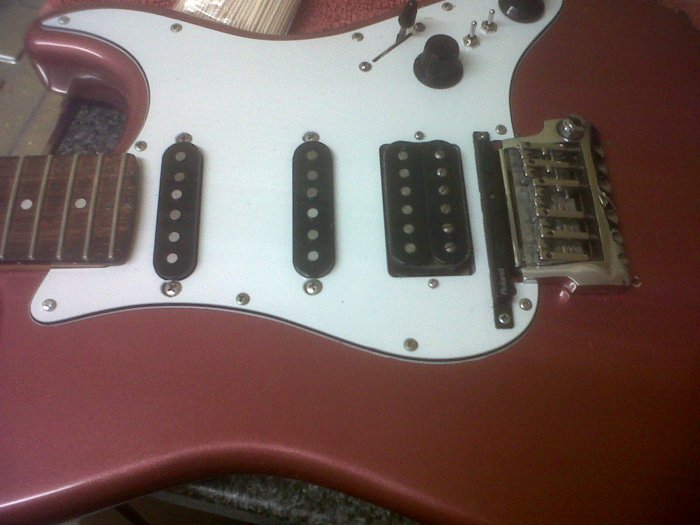
Odd-looking beast but it has a wonderfully growly bridge pickup.

IMG-20150121-00189

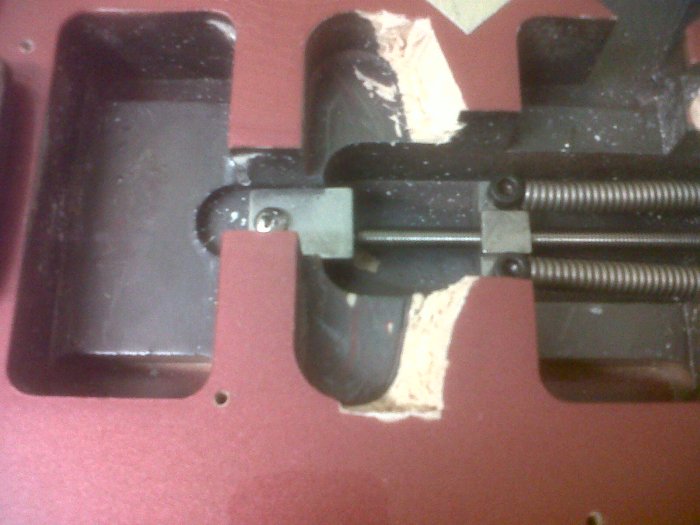
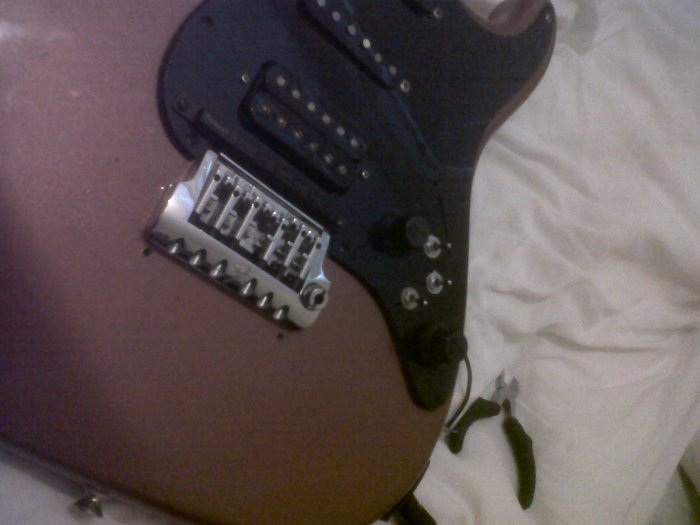
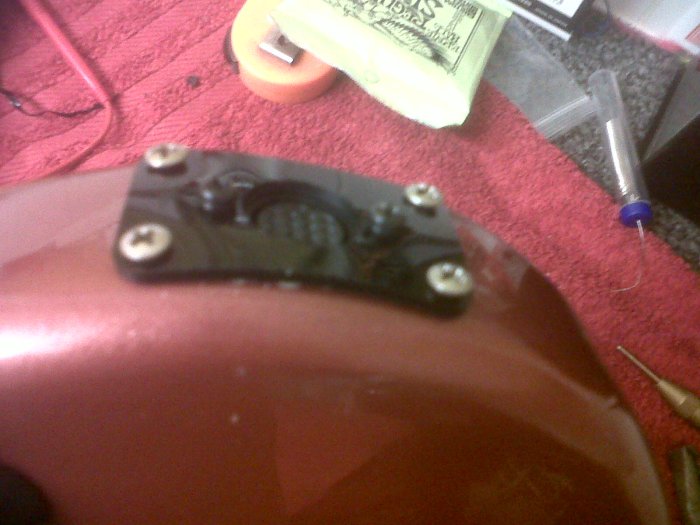
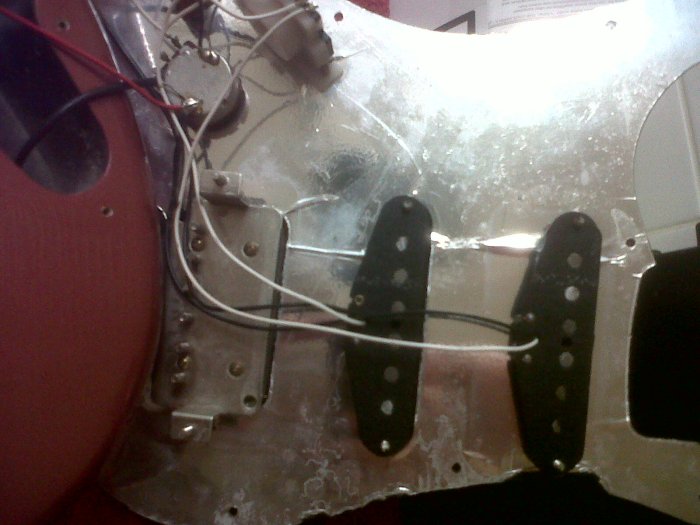
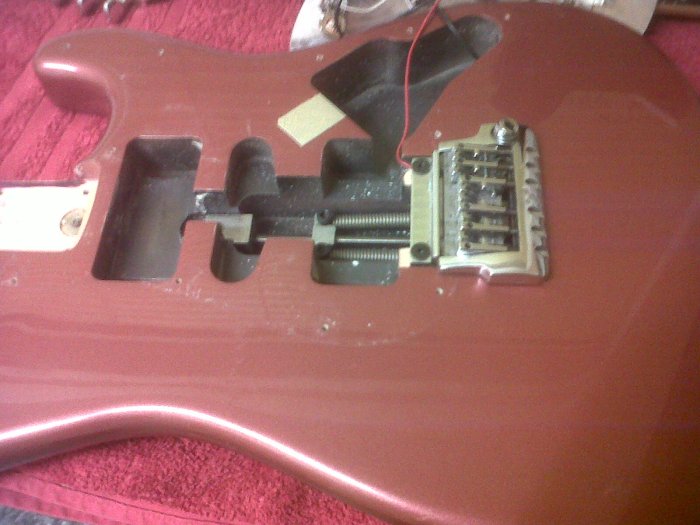
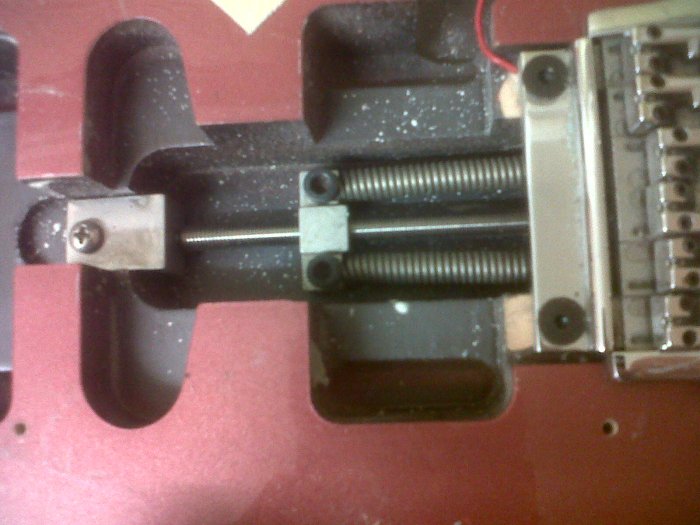
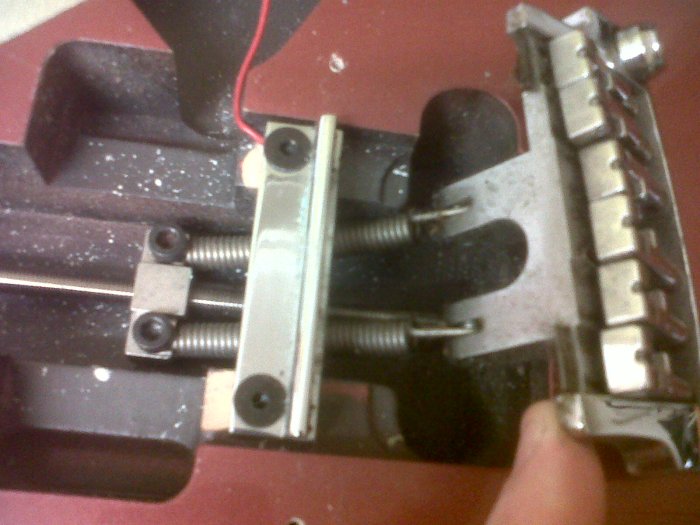
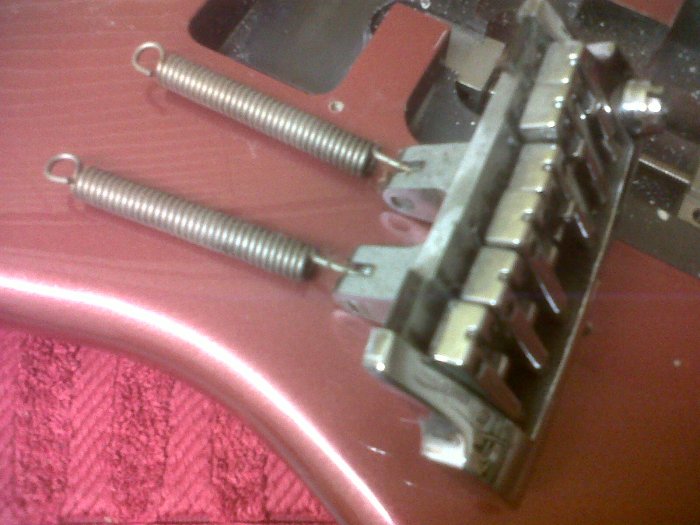
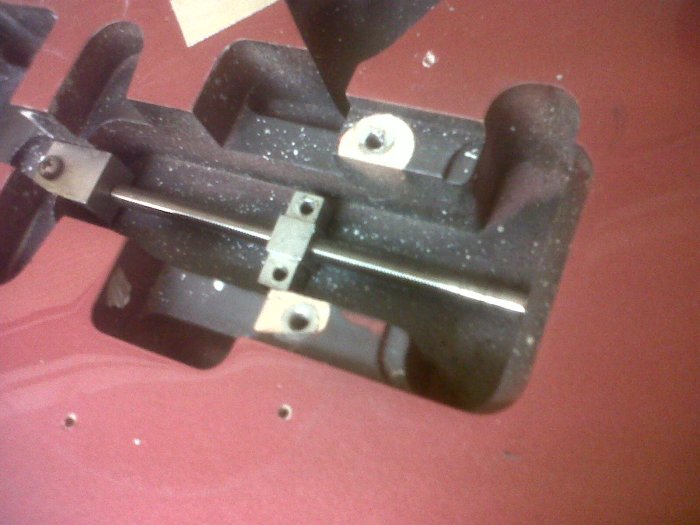
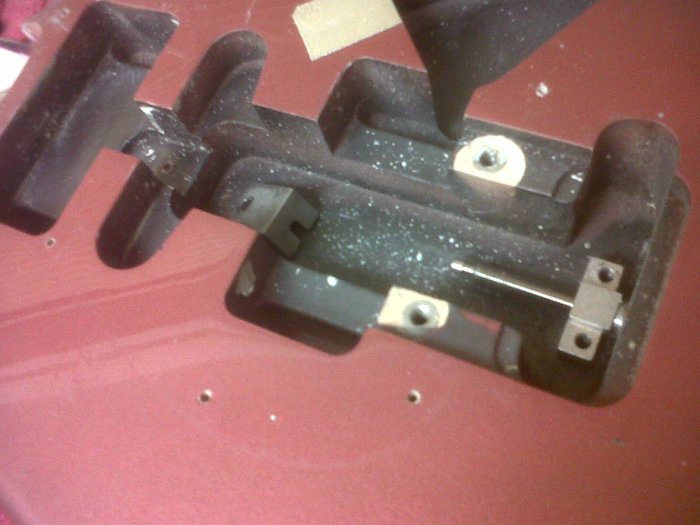
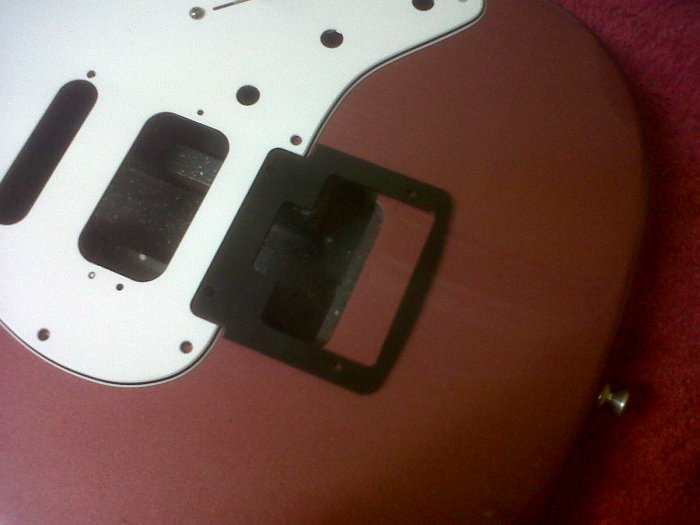
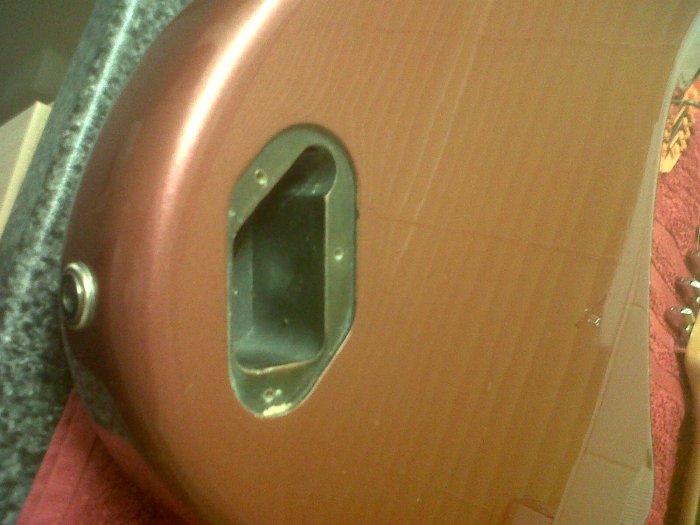
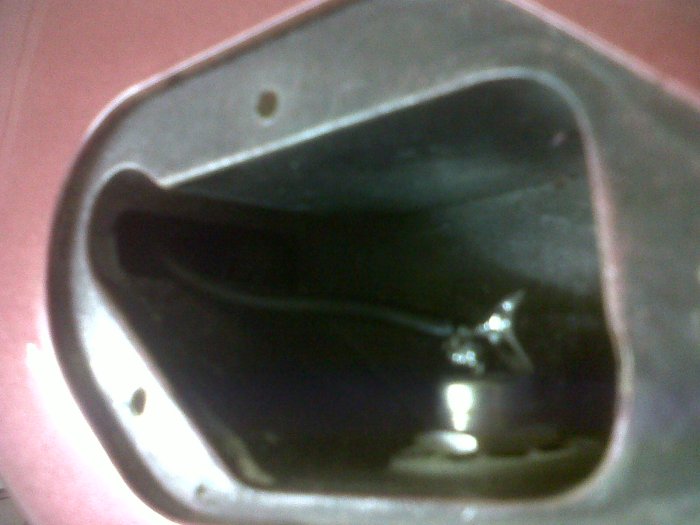
A little detail about this guitar – it has its faults and part of the GK install will involve some other modifications, not least to the bridge. The guitar uses Fender Japan’s Schaller-designed System II tremolo bridge and while it has great tuning stability it is completely non-standard and an absolute pig to restring so it’s getting replaced with a Kahler top-mounting fixed bridge and this is really where we enter unknown territory with this guitar. I have no idea how it’s routed at the moment, the System II is not routed like a normal Strat so there are no springs in the back of the guitar …

IMG-20150121-00184

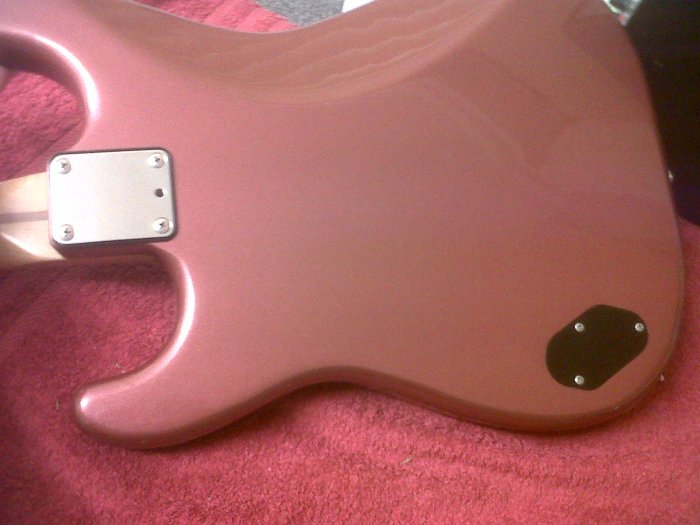
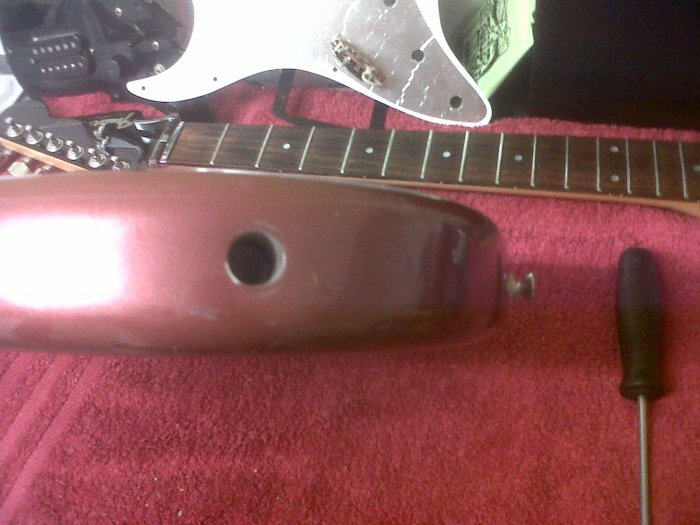
… and there’s a hex bolt next to the lower strap button to adjust the return spring tension. Eagle-eyed readers will notice that the output jack is non-standard too, it’s mounted in the same location as a Telecaster jack but it’s a small barrel socket instead of the usual plate you’d expect to see there.

IMG-20150121-00187

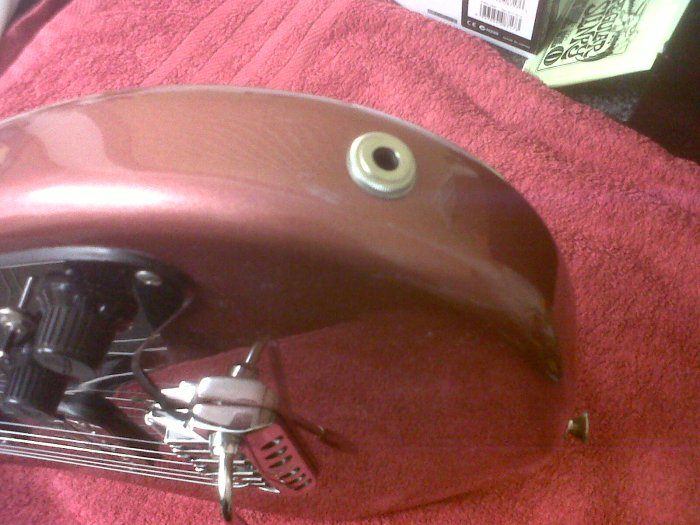
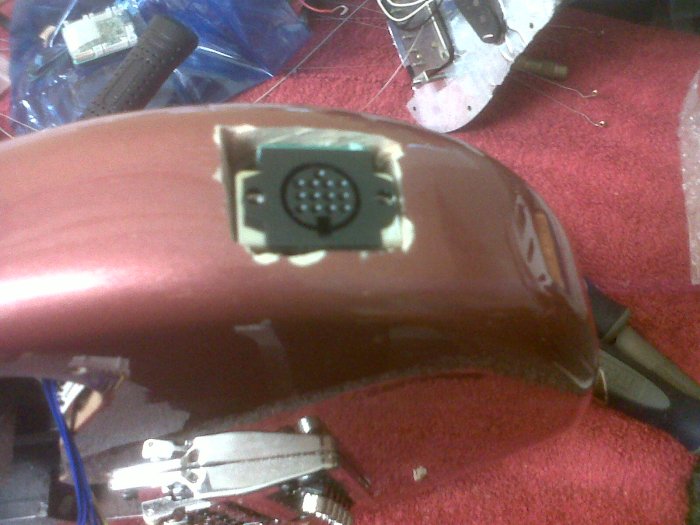
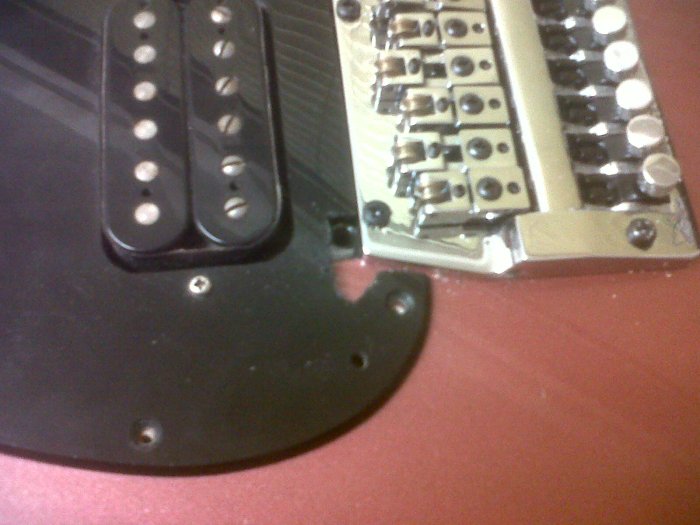
So while in some ways it’s a weird guitar, in other ways it should be the ideal instrument for a GK install. The jack socket can easily be opened out for the 13-pin connector and there’s a fairly large cavity around it to accomodate the circuit board. As for the bridge, I’ve obtained a Kahler routing template which looks like this …

7300 routing template

Lining up the template over the trem tells me that there’s plenty of wood under the two rear screws but none directly under the other screws so I will probably end up with just two screws holding the bridge. A bit risky perhaps but certainly better than struggling with the badly-designed System II currently on there.

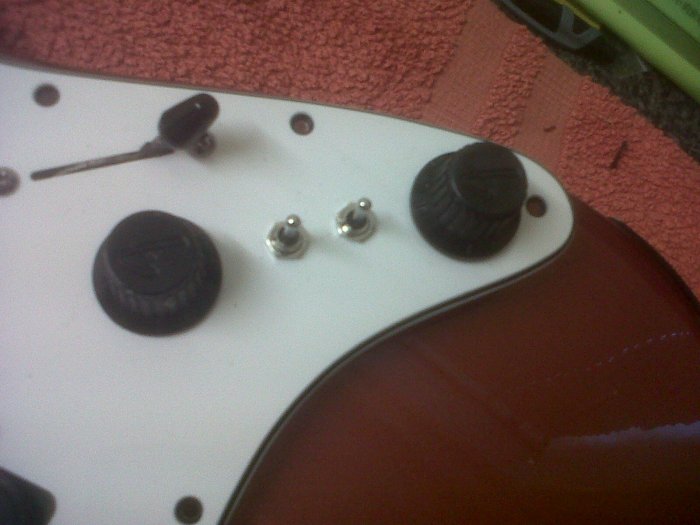
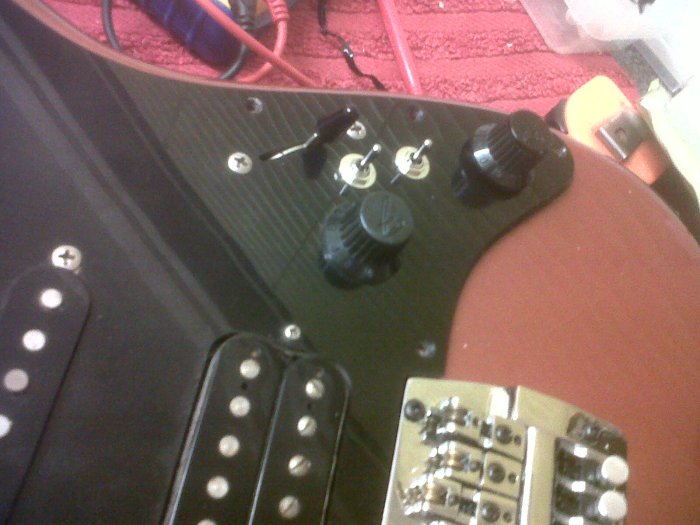
The only other change will be to fit a white 3-ply pickguard. The original is single ply black and really makes the guitar look like a cheap 1980s Marlin Sidewinder. If you remember those things then you’ll know that it has to go. Warmoth are quoting silly money for shipping and they don’t do two-knob pickguards (why?) so I’ve contacted Jack’s Instrument Services for a quote on a custom one. I don’t use tone controls so it’ll just be magnetic pickup volume and GK volume. The guitar has the incredibly classy F-stamped control knobs so those have to stay! GK up/down switches will be on a single momentary switch next to the pickup selector.

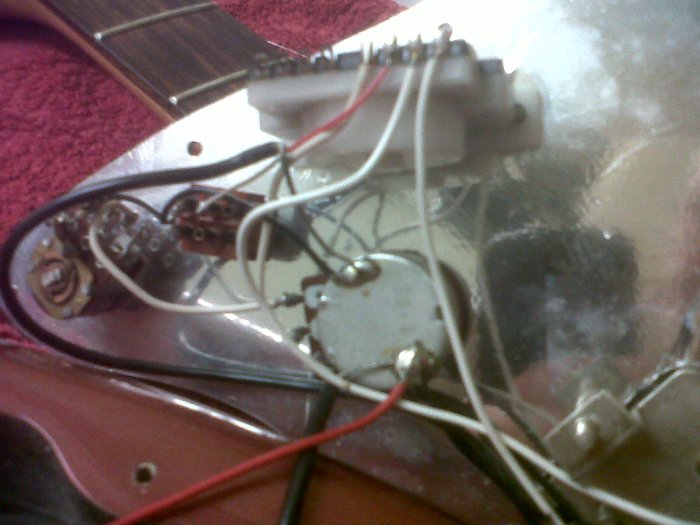
So I know roughly how much work’s involved now and I’ve got a good idea what tools and parts I need to order before work begins. I’m also getting a replacement 50k LIN pot to replace the cheap piece of crap Roland supply with the kit. That can go straight in the bin.